Here is a tutorial on rendering eyes! I think eyes are really variable depending on your art style, so I encourage you to take small bits and pieces from this tutorial rather than following it exactly~
My style is more painterly, so I don’t use line art in my rendering process! Therefore, the first step involves the creating the base we will be painting over.

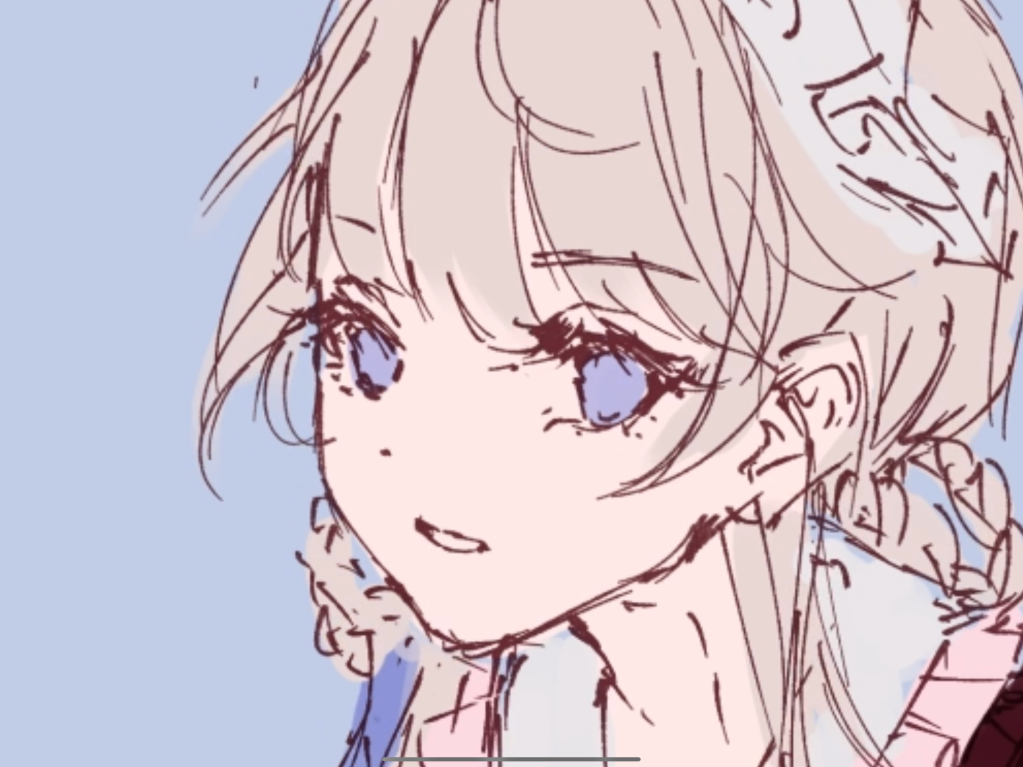

First is my “clean sketch” that I do over my very messy initial sketch (blue). By far my favorite pen for this is a custom pen for Clip Studio Paint (here). Then fill in your clean sketch with base colors, set the clean sketch layer to multiply, lower its opacity, and merge it with the base color layer.


The next step involves refining the eyelashes and skin around the eyes before actually working on the iris. First, take a dark, desaturated red color (or, alternatively, a dark, desaturated version of the eye color) and use it with a blurry watercolor brush (I use this) to roughly draw the upper eyelash.
Then, add blush to the cheeks, upper and lower eyelids, and lips.


Time to render the irises! I use a darker version of the base eye color to outline the eye and add a pupil, shadow, and “wavy circle” around the pupil.
Then, I use an even darker color to emphasize the shading near the top of the iris.
I use an add (glow) layer and the base color to brighten the lower part of the eye with an airbrush.
Add pinpoint highlights with white to various parts of the eye; I like to put one right over the pupil, one on the top eyelash, one on the bottom, and one on the side of the iris.


Next is the eye whites (AKA sclera). I use a desaturated light version of the skin color (usually a really light red/orange shade) to clean up the area around the iris and eyelash, as well as defining the boundary between eye and skin. Then I add a desaturated medium blue/purple for the eye shadow. I like to leave a gap between the shadow and the eyelash. I use Clip Studio Paint’s blur brush to blend the edges between the shadow and the eye white as well as the iris and the eye white.
I use a saturated pink/orange to go over the blurred edges of the iris and shadow with an airbrush.


Back to the eyelash and eyelid! I decided I drew the eyes too small for my liking so I made them larger. It might seem a little off-putting at first, sorry~
I use a saturated blush tone and airbrush to blend the eyelashes more with the skin. I’m especially fond of using it on the lower eyelid.
I add individual eyelashes to the top and bottom lash lines.
In the eyelash, I use the base eye color to highlight the middle of the lash, above the pupil. I think this gives a really pretty effect.
For this drawing in particular, Ophelia was placed in some pretty dramatic lighting, so I decided to do a more prominent highlight on the left eyelash. I used a yellowish color similar to her hair and blurred it slightly with a saturated pink (next/last slide).

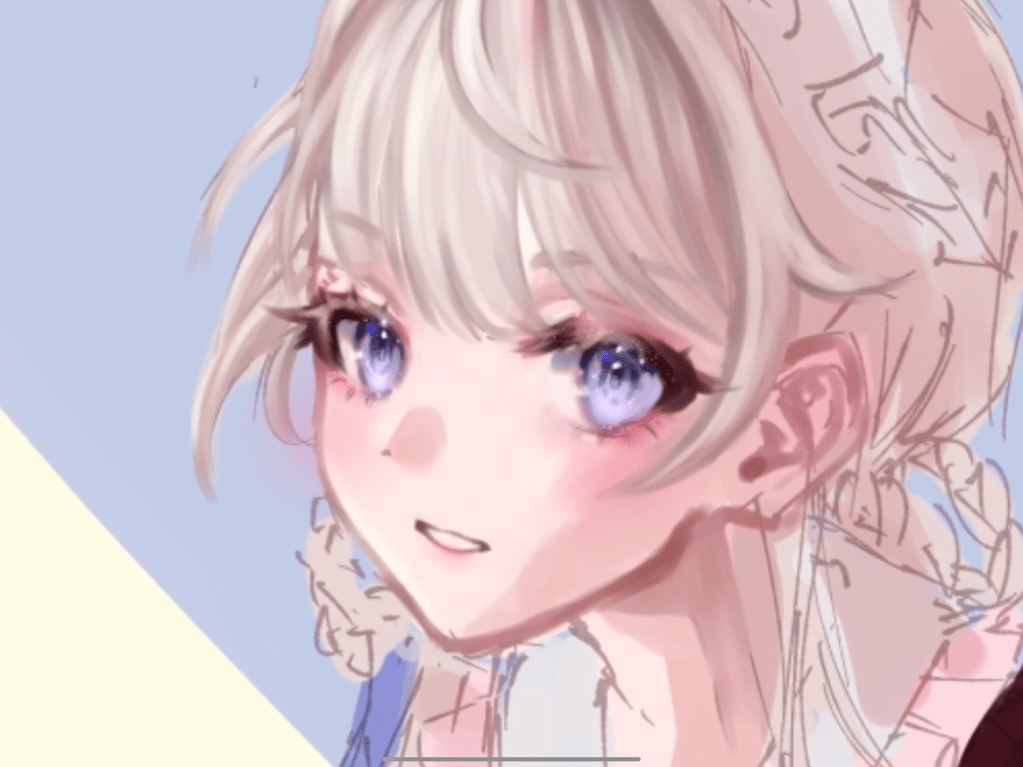
Here she is after rendering her face and bangs! I hope this tutorial was helpful! ❤

Leave a comment